I’ve been writing on my website for quite some time now, but I’ve actually been filming my motorcycle rides for even longer! I remember that I was looking for a cheap motovlog setup to capture some of my rides.
Today I want to share my cheap motovlog setup. It cost me under 100 USD and I think the result for this amount of money is great!
What do you need for a motovlog?
Let’s start with summarizing what we need to make a motovlog. There are four items you’ll need in order to make a stunning motovlog for Youtube or personal record:
- Action camera for images
- Microphone for sound
- A mount to hold the action camera
- Editing software to edit the video
I’ve found really cheap options for these four items, so that’s why I thought it would be nice to share them with you all.

Motovlog Action Camera
First of all, you’ll need to take images to make a vlog right? I’ve found a really affordable action camera that does the trick.
The camera is from China. You might think that everything from China is rubish (especially action camera’s), but let me prove you wrong. I also own a GoPro (a couple of years old) and the images from my Chinese camera are just as good. The good part is that I only paid a couple of ten-dollar bills.
I’m talking about the APEMAN action camera (Amazon).
I purchased my camera more than a year ago but I still love it. I’m not only using it for moto vlogging. I bring this little camera on my traveling trips as well, to document my traveling. This is what value for money is all about!

Microphone for sound
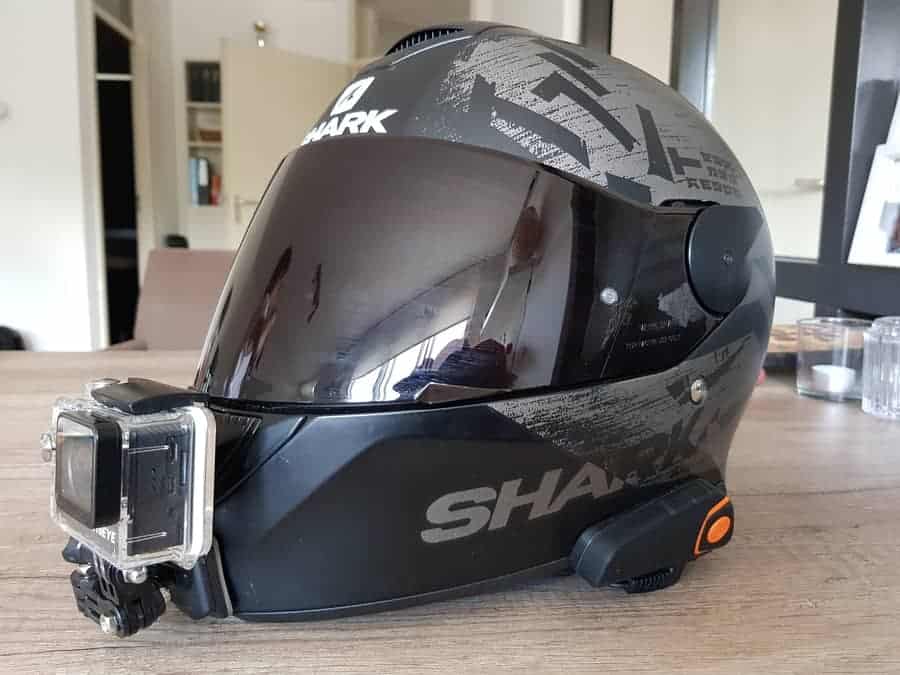
This is where the fun part starts! The camera doesn’t have a microphone plug option so you can’t just insert an external microphone. But that’s no problem for me! I use a wireless option which allows me to place the camera wherever I want. I can mount it to my helmet, on my chest or on my bike.
There is a really cheap motorcycle communication system that does a great job for the amount of money you are going to spend on it! I’m talking about the BT S-2 (Amazon) motorcycle headset.
This is an absolute must-have for every single motorcycle rider! It’s extremely cheap compared to competitors like Sena, but it still does an excellent job. The system is made for walkie-talkie communication, music streaming or phone calls. I use it to call my girlfriend on the way and I’m not even kidding when I tell you that she doesn’t realize I’m on my bike! It’s insane for this price, but it’s true!
The system is also for sale on third party websites. It seems to be brandless so there are loads of brand that resell these things. The good thing is that the internet is full of spare parts and replacement batteries in case you break your original product.

Mount for Action Camera
The good thing about this action camera is that it fits almost all action camera mounts. You can just buy cheap GoPro replacement mounts and use these to mount your camera.
I’ve stuck a mount to the chin compartment of my helmet. It’s connected with some heavy-duty tape. It’s been on my chin for over a year now and it’s not moving any time soon.
Editing software
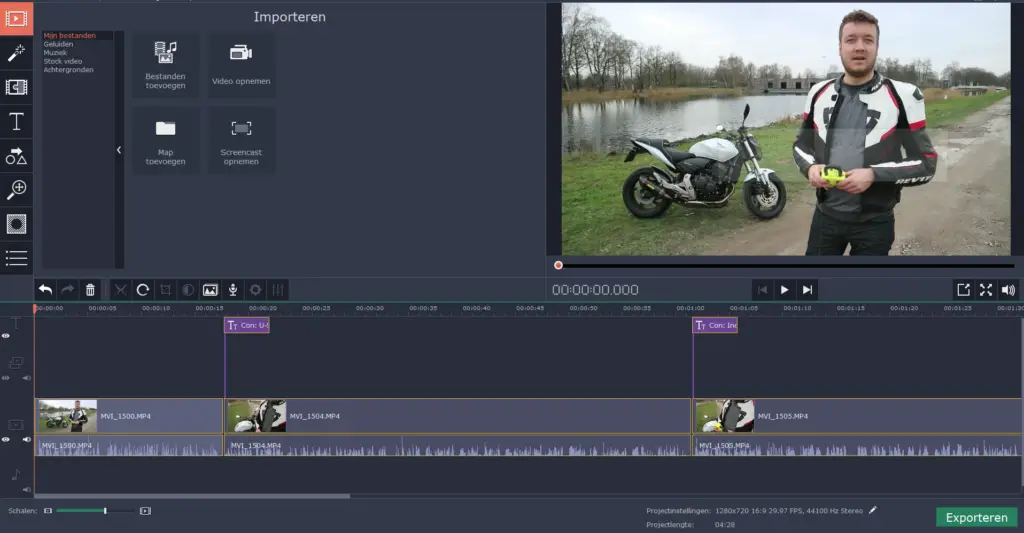
Last but not least, there is editing software. Editing software for video can be extremely expensive. Luckily, there are some cheap options. I make all my videos with Movavi Video Editor. It’s a cheap editing tool that only requires a one-time payment.
Movavi offered my readers an extra discount if they order through this affiliate link (Go to Movavi)

How to produce your Motovlogs
So you capture the video with the action camera and you record the audio with the headset right?
I use an SD-card to save the video’s on my camera. I have a 32GB SD-card and I would recommend taking a 32GB or bigger. The videos are filmed in high-quality and can become pretty big.
I use my mobile phone to capture the audio. I simply connect the headset with my phone and use this Android App (Playstore) to capture audio through my Bluetooth headset.
I simply turn the camera on and start recording. Then I start the recording on my phone for the sound. Last but not least, I clap my hands in front of the camera to have an ‘anker point’.
You’ll need this when you want to merge the audio and video together. At the end of the day, I connect my camera and my phone to my computer. I import the video and the audio to Movavi and start editing.
I look for the part where I clap my hands and I align the audio and the video. The rest is history!
Tips to make your Motovlogs better
- Always make a good intro. You only have a couple of seconds to get your viewers interested in your content.
- Make sure you create a good looking thumbnail. I usually use Canva for this. I take a shot from the recording and past the title of the video on top of it.
- Keep your microphone out of the wind. It comes with a wind blocker, but wind can always be a problem. Make sure it’s behind the chin compartment of your helmet and close your visor to block wind on top.
- Always keep your own safety in mind. It’s easy to forget about your surroundings when you are filming. Make sure you keep your attention to the traffic. An accident will do great for views, but we better stay out of any trouble!
